7 Tips for Choosing GI Pipe Length in Feet
Choosing the right Gi Pipe Length In Feet can affect transport, installation time, joint placement, and material waste. A pipe that looks suitable on a supplier’s list may be awkward beside a wall, inside a service shaft, or on a crowded worksite. Small measuring errors can travel a long way. Literally.
This introduction previews seven practical tips for selecting pipe lengths with fewer surprises. It considers the run’s measured dimensions, required fittings, cutting allowance, handling limits, and the supplier’s available stock. Always confirm product specifications and actual lengths before ordering; dimensions and availability can differ between suppliers. A tape measure, a clear layout, and a quick check of the delivery details are useful starting points. Still, they do not replace project-specific review.
For transparency, the following is an illustrative quote, not a verified statement from a real professional: fictional GI pipe specialist Arjun Rao says, “Measure the installed route, then allow for joints, cuts, and handling.” It is a plain reminder, not a universal rule. The right allowance depends on the layout and installation method. Even experienced buyers can overlook a tight turn or an inconvenient pipe bundle. That deserves a second look. The tips ahead help readers compare length options carefully, ask suppliers clearer questions, and choose Gi Pipe Length In Feet that fits the job—not just the catalogue.
Understanding GI Pipe Lengths and Common Standard Sizes
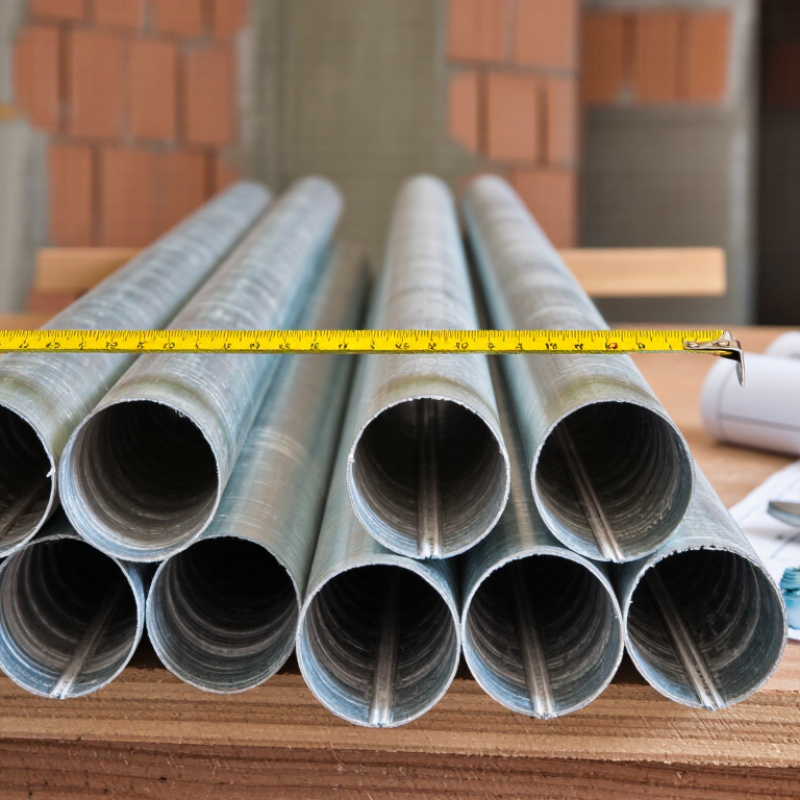
GI pipe length usually refers to the pipe’s end-to-end measurement, not its nominal diameter. Common stock lengths include about 6 metres (roughly 20 feet), while some suppliers offer 3-metre (10-foot) sections. Availability varies by region, pipe size, and manufacturing specification. Check the product sheet before planning a run.
Know the difference. A 1-inch nominal pipe does not measure exactly 1 inch across its outside. Nominal size identifies a pipe-size category; wall thickness and standard dimensions affect the actual measurements. For a water line, confirm both the required diameter and the supplied length. Then allow for threaded ends, fittings, and any pieces that must be cut. A tape measure helps, but the written specification matters more.
Think about handling, too. A 20-foot section may reduce the number of joints, yet it can be awkward in a narrow corridor or on a small vehicle. Shorter sections are easier to carry and position. They may also mean more connections. Measure the route, note access points, and confirm whether the quoted length is nominal or exact. Details get missed. It happens. Recheck the order before cutting; once a section is shortened, a small estimating error can waste useful material.
Measuring the Route and Calculating the Required Run
Measure the pipe route along its centerline, not as a straight line between endpoints. Follow each wall, rise, and offset with a tape or flexible measuring line. Record every segment in feet, then add the lengths to estimate the required run. An elbow changes the route. Include the fitting dimensions and threaded engagement specified for your connections, since these affect cut length. Do not assume every fitting uses the same allowance. Small errors add up, especially around tight corners.
Sketch the run and label each measured section. For example, a route with 6.5 feet along a wall, a 3-foot rise, and a 2.25-foot offset totals 11.75 feet before connection adjustments. Check the fitting data or have a qualified pipe installer confirm those adjustments. Measure twice. A sketch can look exact and still miss a cramped corner or an uneven wall. Before cutting, compare the calculated usable length with the pipe’s listed length, including any threaded ends that cannot provide full usable run. Keep a short offcut nearby for checking alignment, but do not count it as guaranteed usable pipe. I would recheck the route after supports are marked; that step is easy to overlook.
7 Tips for Choosing GI Pipe Length in Feet - Measuring the Route and Calculating the Required Run | Tip | What to Measure or Check | Example or Calculation |
| 1. Define the route endpoints | Mark where the pipe run begins and ends, and identify the route it must follow around walls, equipment, and other obstacles. | Measure along the planned pipe path, not just the straight-line distance between the endpoints. |
| 2. Break the route into segments | Record each straight section separately, including horizontal, vertical, and angled sections. | 8 ft + 6 ft + 4.5 ft = 18.5 ft of measured route. |
| 3. Convert all measurements to feet | Use one unit throughout the calculation. There are 12 inches in 1 foot. | 7 ft 9 in = 7 + (9 ÷ 12) = 7.75 ft. |
| 4. Account for fittings and connection points | Check the fitting dimensions and the measurement method. For a centerline route, account for fitting takeouts when determining pipe cut lengths. | If a route is 18.5 ft and two specified fittings each have a 3 in takeout, the straight-pipe cut length is 18.5 − (6 ÷ 12) = 18.0 ft. Confirm actual takeouts for the selected fittings. |
| 5. Include vertical rises and drops | Measure the actual elevation change between connection points; include any vertical offsets in the route total. | A 10 ft vertical section plus a 12 ft horizontal section gives a 22 ft route before fitting adjustments. |
| 6. Set a project-specific allowance | Add any spare length required for site adjustments or cutting, based on project conditions. Do not treat an allowance as installed route length. | For an 18.5 ft measured route, a project-approved 1 ft spare gives a planning quantity of 19.5 ft, before fitting takeouts and cut planning. |
| 7. Verify available pipe lengths and the cut plan | Confirm the supplier's available GI pipe lengths and check that the planned cuts, joints, and fitting connections meet the required run. | If a supplier confirms a 20 ft pipe length is available, it can cover a 19.5 ft planning quantity, subject to cut lengths, fitting takeouts, and installation requirements. |
Allowing for Fittings, Joints, and Cutting Waste
When choosing GI pipe length in feet, measure the route along its centerline, not just the wall-to-wall distance. Mark every elbow, tee, valve, and connection on a simple sketch. Fittings change the usable run. Check their center-to-end dimensions and allow for thread engagement; a pipe cut to the visible gap may end up too short. Count joints carefully, especially where several short sections meet.
Compare your measured total with the supplier’s available stock lengths before deciding how many pipes to buy. Plan cuts so offcuts can serve another section, but do not assume every leftover piece will fit. Saw blades remove material, and rough cuts may need trimming. Leave a little extra for facing or threading, then confirm the final dimensions on site. Small differences matter.
Include a modest allowance for damaged ends and unavoidable waste. Too much extra pipe creates storage and handling problems; too little can delay the job. That balance is easy to misjudge. For a complex layout, have the installer review the cut plan and fitting schedule before purchase. Recheck measurements after supports and connection points are fixed, since the neat drawing may not match the real route perfectly.
Choosing Practical Lengths for Transport and Installation
Choosing GI pipe length is a balance between fewer joints and easier handling. Longer pieces can reduce connections across a run, but they may be awkward on narrow roads, stairwells, or crowded sites. Measure the delivery vehicle, unloading area, and installation route before ordering. A pipe that fits the drawing may still be difficult to carry through a doorway.
Tip: Check the route, not just the pipe run. Confirm available stock lengths with the supplier, then compare them with your required finished dimensions. Leave room for cutting and threading, and allow for trimming errors. Shorter sections can be easier to move by hand, though they may create more joints and installation time. Keep cut ends protected from dirt and moisture while work is underway. For a long run, mark joint positions on the layout before choosing lengths. This small step can prevent a joint from landing behind a support or inside a tight corner. I have seen plans overlook the unloading space; it is an easy detail to miss, and worth checking twice.
7 Tips for Choosing GI Pipe Length in Feet
Practical reference lengths for transport and installation
How to use this chart: The values are conversions of 3 m, 6 m, and 12 m reference lengths (1 m = 3.28084 ft), rounded to two decimal places. Shorter lengths are generally easier to handle in confined spaces, while longer lengths may reduce the number of joints. Check supplier availability, vehicle capacity, site access, and local transport requirements before ordering; actual GI pipe lengths vary.
Checking Specifications, Compatibility, and Local Availability
Before choosing a GI pipe length in feet, check the project drawing and the supplier’s specification sheet. “GI” describes galvanized iron or steel, but it does not identify the pipe’s diameter, wall thickness, or end finish. Those details affect fit. A pipe with threaded ends may not suit a connection designed for plain ends, even when the nominal size matches.
Measure the route, including offsets and space for fittings. A tape measure along the wall can miss a bend around a column, so mark the actual path. Then confirm whether the listed length is a stock length or a cut-to-order measurement. Leave room for trimming, but avoid assuming every cut piece will have usable threads.
Small details matter. I have found that a neat materials list can still overlook delivery constraints. Check what local suppliers have on hand, how quickly they can cut it, and whether long lengths can reach the site entrance. If stock is limited, compare available lengths against the layout before ordering; extra joints may add labor and potential leak points. Ask for the measured length and tolerances in writing, especially when several pieces must align. A little rechecking can prevent a pipe from arriving just short of the intended run.