

- 713.590.1312
- sale@pandbtools.com
How to Choose the Best Aluminum LED Strip?
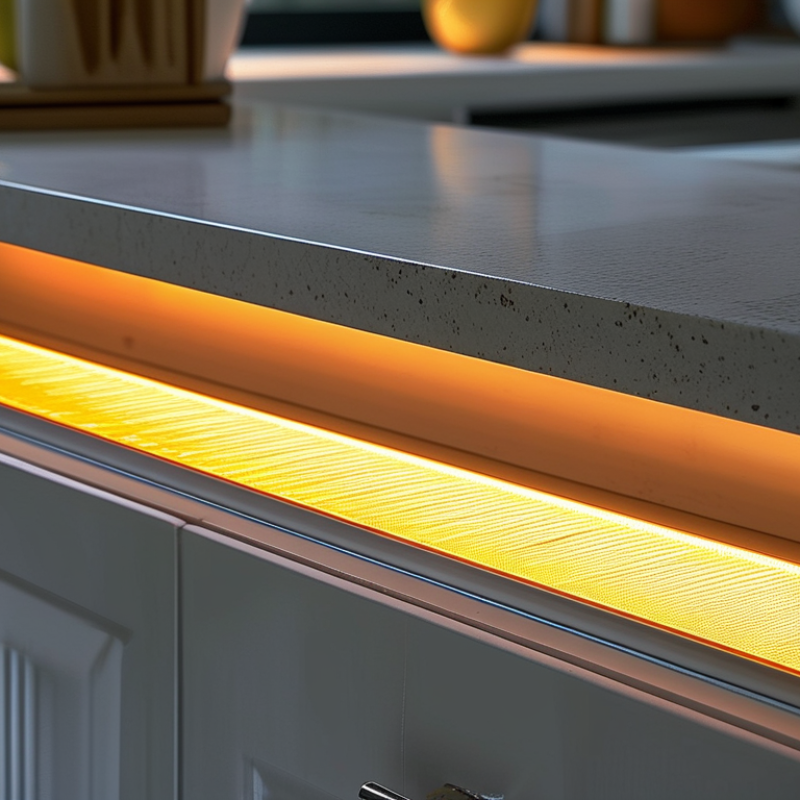
Choosing the best Aluminum Led Strip is not only a matter of brightness or price. It involves heat control, profile design, LED quality, installation conditions, and long-term reliability. A strip placed under a kitchen cabinet faces different demands from one installed in a humid bathroom or commercial display. Small details matter. The aluminum channel should feel rigid, the diffuser should sit evenly, and the strip should make clean contact with its heat-dissipating surface.
Industry data supports this broader view. The U.S. Department of Energy’s solid-state lighting research has repeatedly identified thermal management, power efficiency, and color quality as key factors in LED performance. The International Energy Agency also reports that LED lighting has become the dominant lighting technology in many markets, increasing demand for efficient and durable systems. Grand View Research has projected continued growth in the global LED lighting market, although estimates differ by region and product category. That uncertainty deserves attention.
James Brodrick, a former U.S. Department of Energy lighting technology manager, stated, “LED performance depends on the entire system, not the diode alone.” His point remains practical. A powerful LED strip can still fail early inside a thin, poorly ventilated profile. Conversely, a moderate strip may perform well with proper aluminum housing and installation. This guide examines LED density, wattage, color rendering, IP ratings, voltage stability, and profile dimensions. It also considers real-world mistakes, including choosing excessive brightness or ignoring heat. There is no perfect specification sheet. The best Aluminum LED Strip is the one that fits the space, the wiring, and the user’s expectations.
Define Your Lighting Goals and Installation Requirements
How to Choose the Best Aluminum LED Strip?
Define your lighting goal before choosing an aluminum LED strip. A kitchen counter needs bright, even task lighting. A bedroom may need softer illumination and warmer color. Measure the installation area carefully, including corners and gaps. A two-meter cabinet rarely needs a five-meter strip. Extra length can create awkward bends and visible wiring.
Installation conditions matter just as much. For recessed channels, choose a slim aluminum profile with a diffusing cover. Surface-mounted profiles work better under shelves or along walls. Check the available depth before ordering. The strip must fit without pressure. For humid areas, select suitable protection and verify the product’s installation guidance. Aluminum helps manage heat, but it cannot replace correct ventilation or a suitable power supply.
Tips: Mark the route with masking tape first. Test the strip at full length before fixing it permanently. Keep connectors accessible. I once skipped this step and had to remove a finished panel. Not ideal. Also, do not judge brightness from wattage alone; review lumen output, color temperature, and spacing between LEDs. In my experience, a slightly dimmer strip with consistent diffusion often looks more refined than a powerful strip with visible bright spots. Recheck your plan at night, because daylight can hide uneven lighting and glare.

How to Choose the Best Aluminum LED Strip?
Define the lighting goal first, then match the strip’s power, brightness, protection rating, and installation environment. The chart shows common nominal power classes used for different lighting applications.
Installation guidance: Use lower-power strips for decorative effects and higher-power strips for general or task lighting. Select IP20 for dry indoor areas, IP44 for locations with occasional moisture, and IP65 or higher for exposed outdoor or wet environments. Install higher-power strips in an aluminum profile for heat dissipation, and choose a power supply with at least 20% additional capacity.
Compare Aluminum Profiles, LED Strip Types, and Light Output
Choosing an aluminum LED strip system starts with the profile, not the strip alone. A shallow profile suits low ceilings and narrow cabinets, but it may show bright dots. A deeper channel creates distance between LEDs and the diffuser, producing a smoother line of light. For damp areas, use anodized aluminum and a properly sealed diffuser; moisture can damage exposed connections. In my installations, a frosted cover hides hotspots better than a clear cover, although it reduces brightness. That trade-off is easy to overlook.
LED strips differ in density, color temperature, voltage, and protection rating. High-density strips place LEDs closer together and work well for continuous task lighting. Lower-density versions can be practical for shelves, where the light is indirect. Choose warm white for wood and hospitality spaces; neutral white often reveals kitchen surfaces more accurately. Color-changing strips need compatible controllers and enough power headroom.
Do not guess. Calculate total wattage from strip length, then select a driver with sensible reserve capacity. A five-meter run may lose brightness near its end if the cable and power feed are undersized.
Light output should be judged in lumens, beam spread, and mounting position, not wattage alone. A powerful strip behind a narrow diffuser may look harsh, while a softer strip can illuminate a wall evenly. Test a short sample at night. I have sometimes chosen a brighter strip, then regretted the glare on glossy tiles. Check thermal behavior after one hour; warm aluminum is normal, but excessive heat signals poor contact or loading. Also consider service access, because a beautifully hidden profile is frustrating when replacement becomes necessary.
Evaluate Heat Dissipation, Durability, and Waterproofing
Choosing the best aluminum LED strip starts with the aluminum channel, not the diode count. In my installations, a thick profile kept the strip cooler above a kitchen worktop. Heat matters because prolonged warmth can reduce brightness and shorten component life. Look for a continuous profile with enough surface area. A narrow channel may look neat, but it can trap heat. Use thermal data when available. Otherwise, compare profile dimensions and airflow conditions. Never bury a high-output strip in sealed wood without testing it.
Durability depends on the strip, diffuser, adhesive, and mounting surface. Clean painted metal or glass with isopropyl alcohol, then press the strip evenly. Corners need proper connectors or a gentle bend radius. Sharp folds can damage solder joints. I have seen reliable lighting fail after installers pulled the strip during fitting. Allow slack near power connections. Check voltage drop on long runs; dim ends often reveal undersized wiring. Aluminum protects against impacts, but thin walls can dent during transport. That detail is easy to overlook.
Waterproofing must match the location, not just the product label. IP65 protects against water jets, while IP67 covers temporary immersion under defined test conditions. Neither rating excuses poor end sealing. Seal cut ends with compatible caps and neutral-cure sealant. Keep power supplies away from splash zones. Confirm local electrical requirements before bathroom installation. Test it first. My own mistake was trusting a dry bench test; condensation appeared after temperature changes. Field conditions are less forgiving.
Check Compatibility With Power Supplies and Control Systems
How to Choose the Best Aluminum LED Strip?
Compatibility with the power supply should be checked before selecting an aluminum LED strip. Match the strip’s voltage exactly, usually 12V or 24V DC. Then calculate its total wattage, including the full strip length. A 5-meter strip rated at 14.4 watts per meter needs 72 watts. Add at least 20% capacity for cooler operation and longer service life. I still recheck this calculation during installation. Small mistakes can create visible flicker, overheating, or uneven brightness.
Control systems need equal attention. Confirm whether the strip requires simple switching, dimming, RGB control, or addressable signals. The controller, power supply, and strip must share compatible voltage and communication requirements. IEC 61347-2-13 covers safety requirements for LED controlgear, while IEC 62386 supports digital lighting control interoperability. These standards do not guarantee perfect system performance, but they provide a reliable technical reference. The U.S. Department of Energy projected that solid-state lighting could reduce lighting electricity use by 86% by 2035 compared with conventional technologies. Efficiency gains matter, but poor compatibility can waste those benefits.
Tips: Measure the actual cable distance before buying components. Long cables may cause voltage drop, especially at 12V. Test the strip, controller, and power supply together for thirty minutes. Check heat near connectors. If the aluminum channel feels unusually hot, reconsider the load, ventilation, or power-supply margin. Specification sheets can be incomplete, so leave room for practical testing.
How to Choose the Best Aluminum LED Strip? - Check Compatibility With Power Supplies and Control Systems
| Selection Dimension | What to Check on the LED Strip | Relevant Technical Specification | Power Supply or Control-System Compatibility | Practical Recommendation |
|---|---|---|---|---|
| Operating Voltage | Match the strip voltage with the output voltage of the power supply and controller. | Common low-voltage options are 12 V DC and 24 V DC. A 24 V strip generally carries the same power with approximately half the current of a 12 V strip. | The power supply, dimmer, RGB controller, and LED strip must use the same nominal voltage. Do not connect a 12 V strip directly to a 24 V output. | Use 24 V for longer runs when the selected strip and control equipment support it. |
| Total Power Load | Calculate the complete load from the strip length and rated power per metre. | Total power = strip length × rated watts per metre. Example: 8 m × 14.4 W/m = 115.2 W. | The power supply should provide the correct voltage and normally have at least 20% headroom above the calculated load. | For a 115.2 W load, select a supply rated for at least about 138 W, provided the voltage matches. |
| Output Current | Confirm that the power supply and controller can deliver the required current. | Current = total power ÷ operating voltage. A 115.2 W, 24 V system requires approximately 4.8 A. | The controller's continuous current rating must meet or exceed the strip's total current. For RGB or RGBW systems, check both total and per-channel ratings. | Allow additional capacity for startup conditions, wiring losses, and future expansion. |
| Strip Type and Channels | Identify whether the strip is single-color, tunable white, RGB, RGBW, or individually addressable. | Single-color strips commonly use two conductors. Tunable white and RGB systems require separate control channels. Addressable strips require data, power, and compatible signal timing. | A single-color dimmer cannot control RGB, RGBW, or addressable strips. Addressable strips need a controller that supports the strip's data protocol. | Choose the controller type before selecting connectors and aluminum profiles. |
| Dimming and Control Method | Select the control method required for the installation. | Common methods include PWM dimming, wall-panel control, radio control, wired control, and building-automation interfaces. | The controller must accept the intended input signal and provide the correct output voltage, channel count, and current capacity. | For low-voltage LED strips, use a compatible constant-voltage controller rather than a constant-current LED driver. |
| Power Supply Type | Verify that the supply is designed for constant-voltage LED loads. | The output voltage must remain within the LED strip's specified operating range. Input voltage, enclosure rating, cooling method, and electrical protections should also be checked. | The supply must be compatible with the installation environment and the controller's input requirements. Dimmable supplies require matching control interfaces. | Use a ventilated supply for higher loads and keep the supply accessible for inspection and replacement. |
| Voltage Drop and Run Length | Consider strip length, copper conductor size, power density, and injection points. | Voltage drop increases with current and cable length. It can cause reduced brightness or color variation, especially on high-power and long installations. | The controller may be correctly rated while the far end of the strip still receives insufficient voltage because of wiring losses. | Use shorter sections, thicker supply wires, parallel feeds, or power injection at multiple points when required. |
| Aluminum Profile and Heat Management | Select a profile with adequate internal space, thermal contact, diffuser compatibility, and mounting strength. | Aluminum helps transfer heat away from the LED strip. Higher wattage per metre generally requires more effective thermal management. | The profile does not replace a correctly sized power supply or controller. Ensure the diffuser and profile dimensions match the strip width. | Bond the strip firmly to a clean aluminum surface and avoid tightly enclosing high-power strips without heat dissipation. |
| Ingress Protection | Match the strip and accessories to the installation environment. | Indoor dry locations may use non-sealed construction. Damp or outdoor locations require suitable protection for the strip, connectors, power supply, and cable joints. | The power supply and controller must have suitable environmental protection; an outdoor-rated strip alone does not protect the complete system. | Seal cable entries and connectors where moisture, dust, or direct water exposure is possible. |
| Color and Light Quality | Check color temperature, color rendering, brightness, and consistency requirements. | White strips are specified by color temperature, such as warm white or neutral white. Color-rendering performance is commonly expressed using CRI. | Tunable-white strips require a multi-channel controller. RGB and RGBW strips require controllers with matching channel outputs. | Select the light color and rendering performance according to the application, not only by wattage. |
| Wiring and Connectors | Confirm conductor count, polarity, wire gauge, connector size, and current rating. | Single-color systems typically require two conductors; RGB systems require additional channel conductors. Wire capacity depends on current, length, and installation conditions. | Connectors must match the strip width, channel arrangement, voltage, and current. Observe polarity and channel order during installation. | For higher-current or permanent installations, soldered connections with strain relief are often more reliable than small clip connectors. |
| System Testing | Test the complete assembly before final installation. | Check voltage at the power supply and at the far end of the strip under load. Verify brightness, color uniformity, dimming range, and controller response. | Testing confirms that the strip, wiring, power supply, controller, connectors, and profile operate as one compatible system. | Inspect for excessive heat, flicker, unstable colors, loose terminals, and unexpected voltage loss before closing the profile. |
Note: Always follow the electrical ratings, wiring instructions, and installation requirements supplied with the specific LED strip and control equipment.
Select the Best Aluminum LED Strip for Your Project
Selecting the best aluminum LED strip starts with the project, not the product photograph.
Measure the run, mounting surface, ambient temperature, and required brightness. An experienced installer also checks voltage drop across long sections. For a kitchen shelf, a shallow aluminum profile may be enough. A ceiling cove usually needs deeper housing and a wider diffuser.
Efficiency matters, but wattage alone can mislead.
The U.S. Department of Energy’s LED Lighting Facts guide reports that LEDs can use at least 75% less energy and last up to 25 times longer than incandescent lighting. Its 2023 Solid-State Lighting R&D Opportunities report also records laboratory LED packages exceeding 200 lumens per watt.
These figures describe potential, not every finished strip. Poor ventilation, overloaded circuits, or weak thermal contact can reduce performance quickly.
Aluminum must touch the strip firmly, with clean installation and suitable adhesive or clips.
Choose the color temperature after viewing the actual space.
Warm white can soften wood interiors, while neutral white often reveals countertop details more clearly. Check color rendering, lumen output per meter, IP rating, and cut intervals.
A sealed profile may protect against splashes, but it can also trap heat if poorly designed.
I have seen bright samples look disappointing after installation. The diffuser, spacing, and wall color changed everything.
Product datasheets deserve more trust than showroom brightness. Still, datasheets can omit long-term thermal results, so a small test section remains worth the extra effort.