

- 713.590.1312
- sale@pandbtools.com
7 Spray Gun Tips for a Perfect Finish?
A flawless finish rarely comes from expensive paint alone. It begins with preparation, controlled movement, and a well-adjusted Spray Gun. The difference appears in small details: a clean nozzle, a steady wrist, correct air pressure, and the right distance from the surface. When these elements work together, the coating lands like a fine, even mist instead of creating runs, dry patches, or heavy edges.
Automotive refinishing expert Kevin Tetz often emphasizes this practical truth: “Preparation makes the paintwork.” His point applies to every spray project. A painter may own advanced equipment, yet still produce an uneven finish after skipping surface cleaning or testing the spray pattern. That mistake is easy to make. It is also expensive to correct.
This guide, “7 Spray Gun Tips for a Perfect Finish,” focuses on techniques that can be tested immediately. You will learn how to choose a suitable tip, adjust pressure, maintain a consistent angle, and overlap each pass correctly. You will also see why temperature, paint viscosity, and lighting can change the final result. Watch the surface closely. Listen to the gun. Small changes matter.
Perfection is not guaranteed.
Even experienced painters sometimes move too quickly or trust settings without testing them. A scrap panel can reveal problems before the real surface does. Use it. Check the fan pattern under strong light, keep the gun moving before pulling the trigger, and clean the equipment after every session. These habits may feel slow, but they protect both the finish and the material. The goal is not simply a glossy surface. It is a repeatable process you can understand, inspect, and improve.
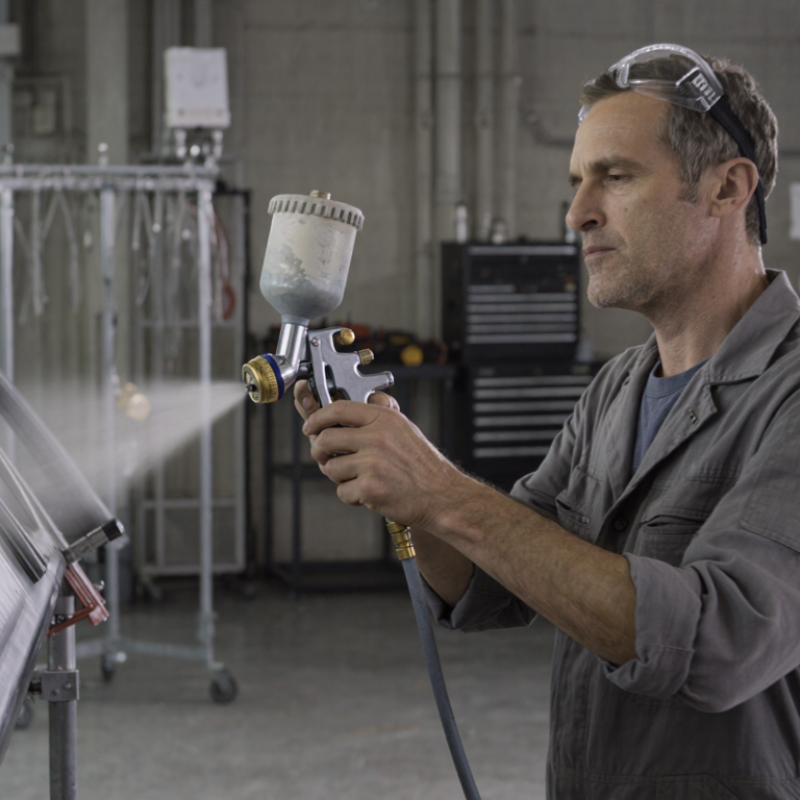
Choosing the Right Spray Gun and Materials
A perfect finish begins with the spray gun, not the paint. Choose the gun by material viscosity, surface size, and required transfer efficiency. A gravity-feed gun suits controlled workshop work, while a pressure-feed system handles thicker coatings and larger panels. For most fine finishes, a 1.3–1.4 mm nozzle offers useful control. Thicker primers may need 1.7–2.0 mm. Always check the coating’s technical data sheet first. Guessing costs more than measuring.
Air volume matters as much as pressure. Match the gun’s air consumption with the compressor’s delivered airflow, not its advertised tank size. The International Organization for Standardization reports that standardized viscosity testing improves coating consistency across applications (ISO 2431). Clean, dry air is essential. The U.S. Environmental Protection Agency identifies solvent use and surface coating as significant volatile organic compound sources in its National Emissions Inventory. Use approved ventilation and suitable respiratory protection. Safety is part of finish quality.
Hold the gun 15–20 centimeters from the panel. Keep it square. Move your whole arm, not just your wrist. Overlap each pass by about 50 percent, then inspect under angled light. A smaller nozzle can reduce runs, but it may produce dry spray when airflow is weak. I still make that mistake occasionally. Test on scrap material first. Record nozzle size, pressure, reduction ratio, and temperature; repeatability improves when memory is removed from the process.

Preparing the Surface, Paint, and Workspace
7 Spray Gun Tips for a Perfect Finish
Preparing the Surface, Paint, and Workspace
Before spraying, prepare the surface rather than chasing defects later. Tip 1: Wash away grease, dust, and silicone residue. Tip 2: Sand uneven areas until they feel consistently smooth. Tip 3: Remove loose coating and wipe remaining dust with a clean, lint-free cloth. Do not trust appearance. A glossy patch can hide contamination. The U.S. Environmental Protection Agency reports that indoor pollutant levels can be two to five times higher than outdoor levels. Ventilation therefore protects both finish quality and worker comfort.
Tip 4: Strain the paint before filling the cup, even when it looks clean. Tip 5: Follow the technical data sheet for thinning, viscosity, and recoat time. Excess solvent may cause runs, while thick paint can produce orange peel. I sometimes prefer one extra test panel. It reveals mistakes cheaply. Record the mixture ratio and adjust only one variable at a time.
Tip 6: Keep the workspace clean, dry, and free from unnecessary airflow. Sweep earlier, not during spraying. Tip 7: Use exhaust ventilation and suitable respiratory protection according to the coating’s safety data sheet. The National Institute for Occupational Safety and Health emphasizes controlling airborne exposure through engineering controls, including effective ventilation. Mask nearby surfaces, maintain a steady gun distance, and overlap each pass consistently. I still miss a spot occasionally. Careful lighting usually exposes it before curing.
| Tip | Preparation Area | Recommended Practice | Useful Measurement or Setting | Why It Matters | Quick Quality Check |
|---|---|---|---|---|---|
| 1Clean and Degrease | Surface | Remove dust, wax, oil, silicone, and loose residue before sanding or spraying. Use a compatible cleaner and allow the surface to dry completely. | Two-stage cleaning: wash first, then perform a final wipe with a lint-free cloth and suitable surface cleaner. | Contaminants can cause fisheyes, cratering, adhesion failure, and uneven gloss. | Wipe the surface with a clean white cloth; no visible dirt or oily streaks should remain. |
| 2Sand for Adhesion | Surface | Sand evenly until the old finish is dull and uniformly keyed. Remove sanding dust before applying primer or paint. | 180–220 grit for smoothing repairs or primer; 320–400 grit for final preparation before finish coats. | A consistent surface profile helps the coating bond and reduces visible scratches. | The surface should look uniformly dull, with no glossy patches or deep sanding scratches. |
| 3Strain and Mix the Paint | Paint | Stir thoroughly, follow the coating manufacturer’s mixing ratio, and strain the material before filling the cup. | Use a fine paint filter commonly rated around 100–190 microns, selected according to the coating type. | Filtering removes lumps and dried particles that can block the nozzle or create rough spots. | Spray a short test pattern; the output should be smooth and free of particles or pulsing. |
| 4Match the Fluid Tip | Spray gun and paint | Choose a nozzle size suited to the material rather than forcing thick paint through a small tip. | 1.3–1.4 mm is commonly used for many thin finish coatings; 1.7–2.0 mm is often suitable for heavier primers. Always verify the coating instructions. | The correct tip improves atomization, transfer, and film uniformity while reducing clogging. | The fan should be even, with no large droplets, dry edges, or heavy center band. |
| 5Set Pressure and Spray Pattern | Spray gun | Adjust air pressure and fluid flow while spraying onto test paper. Set the fan wide enough for the job without creating excessive overspray. | Begin around 20–30 psi at the gun inlet for many HVLP setups, then adjust according to the gun and coating instructions. | Too little pressure produces coarse droplets; too much pressure increases overspray, bounce-back, and dry spray. | A properly adjusted pattern has an even, elongated oval shape with consistent wetness from end to end. |
| 6Control Distance, Speed, and Overlap | Application technique | Keep the gun perpendicular to the surface, move at a steady speed, and begin moving before pulling the trigger. | About 6–8 inches (15–20 cm) from the surface with approximately 50% overlap between passes. | Consistent distance and overlap prevent striping, runs, dry edges, and uneven film thickness. | Each pass should appear equally wet, and the overlap should blend without visible bands. |
| 7Condition the Workspace | Workspace and drying | Control temperature, humidity, lighting, ventilation, and dust. Mask nearby areas and keep the spray path free of obstructions. | Approximately 18–27°C (65–80°F) and 40–60% relative humidity are practical working conditions for many coatings; follow the product instructions. | Stable conditions support predictable drying, reduce blush and dust defects, and improve visibility during application. | Use bright side lighting, clean filtered airflow, and required respiratory and skin protection before spraying. |
Adjusting Air Pressure and Spray Pattern
7 Spray Gun Tips for a Perfect Finish
Adjusting Air Pressure and Spray Pattern
Air pressure controls atomization, overspray, and surface texture. Start with the coating maker’s recommended range, then test on cardboard. A wet, even fan is the target. Tip 1: Measure pressure at the gun inlet, not only at the compressor. Long hoses can reduce pressure noticeably. Tip 2: Raise pressure gradually when the spray looks coarse. Excess pressure creates dry edges and wastes material.
Tip 3: Set the fan pattern before spraying the workpiece. Turn the pattern control slowly until the oval appears balanced. Tip 4: Keep the gun perpendicular to the surface. Tilting it can produce heavy edges and thin centers. Tip 5: Maintain a consistent distance, usually 15–20 centimeters for many coating systems. Too far feels safer, but it often causes roughness. Tip 6: Overlap each pass by about 50 percent. Watch the reflection, not just the color. Tip 7: Reduce pressure slightly for small parts or detailed corners.
The U.S. Environmental Protection Agency requires compliant automotive refinishing spray methods to achieve at least 65 percent transfer efficiency in specified applications. That figure shows why controlled pressure matters. Less overspray can also mean cleaner air and lower material loss. These results are not automatic. I still adjust pressure after temperature changes, because viscosity can shift during the day. My earlier mistake was trusting one setting for every coating. That shortcut produced an acceptable finish, not a perfect one. A final test panel remains essential.
Applying Even Coats with Proper Gun Movement
A consistent finish begins with controlled gun movement, not pressure alone. Hold the spray gun 6 to 8 inches from the surface. Keep the nozzle perpendicular, and move from your shoulder instead of your wrist. Start moving before pulling the trigger. Release it just before stopping. This prevents heavy spots at each end.
Overlap every pass by about half its width. Maintain the same distance and speed throughout the stroke. If your arm slows near an edge, the coating becomes thicker there. I often mark a practice panel before spraying the workpiece. It shows whether the fan pattern is even. On curved surfaces, rotate the piece when possible. Do not twist your wrist. That small mistake changes the spray angle quickly.
Corners need lighter passes. Too much material gathers there. Before spraying the final surface, test on clean cardboard or a spare panel. Check the wetness, pattern, and overspray. Even experienced operators can rush when the finish looks almost complete. I still catch myself chasing a dry patch, which often creates a heavier patch beside it. A better correction is to allow the proper flash time, then apply another controlled coat. Use bright, angled lighting to reveal uneven overlap. Keep ventilation adequate, wear suitable protective equipment, and follow the coating’s technical instructions. Your first setting may be wrong. Adjust gradually, and record what changed.
Cleaning the Spray Gun and Correcting Finish Problems
7 Spray Gun Tips for a Perfect Finish?
Cleaning the Spray Gun and Correcting Finish Problems
A clean spray gun starts with a complete flush, not a quick wipe. Follow the coating’s safety data sheet and use the approved cleaning material. Remove the cup, nozzle, needle, and air cap. Soak only compatible parts. Never force a blocked tip with metal wire. A soft brush protects the opening. Check the air cap holes against a bright work light. Small clogs create large defects.
The U.S. EPA’s 2020 National Emissions Inventory reports solvent-use emissions in the millions of tons nationally. Efficient cleaning reduces waste and limits unnecessary exposure. The American Coatings Association’s 2023 economic report places U.S. coatings shipments near 31 billion dollars. That scale makes repeatable maintenance more than a workshop habit. It protects material, labor, and rework costs. Keep pressure stable. Hold the gun about 15 to 20 centimeters from the surface. Overlap each pass evenly. I still miss this distance sometimes. The finish shows it.
Orange peel usually points to poor atomization, excessive viscosity, or insufficient flow. Add only the thinner permitted by the coating instructions. Runs often mean the gun moved too slowly or delivered too much material. Dry spray can result from excessive distance, low fluid flow, or strong airflow. Correct one variable at a time. Record pressure, tip size, mix ratio, and ambient temperature. Let the panel dry before judging it. A wet surface can hide problems. Before the next job, inspect the needle seal and replace worn parts. Small leaks quietly change the spray pattern.